Before publishing your site, you can create a staging website to test any changes or new features.
The staging website can be created in either a subfolder or a subdomain under your domain name folder. The latter is advised for easy access to the staging website. It allows you to separate the installations by moving the staging website folder outside the live website folder.
- Log in to cPanel.
- Navigate to the Software section, then click on the Softaculous Apps Installer icon.

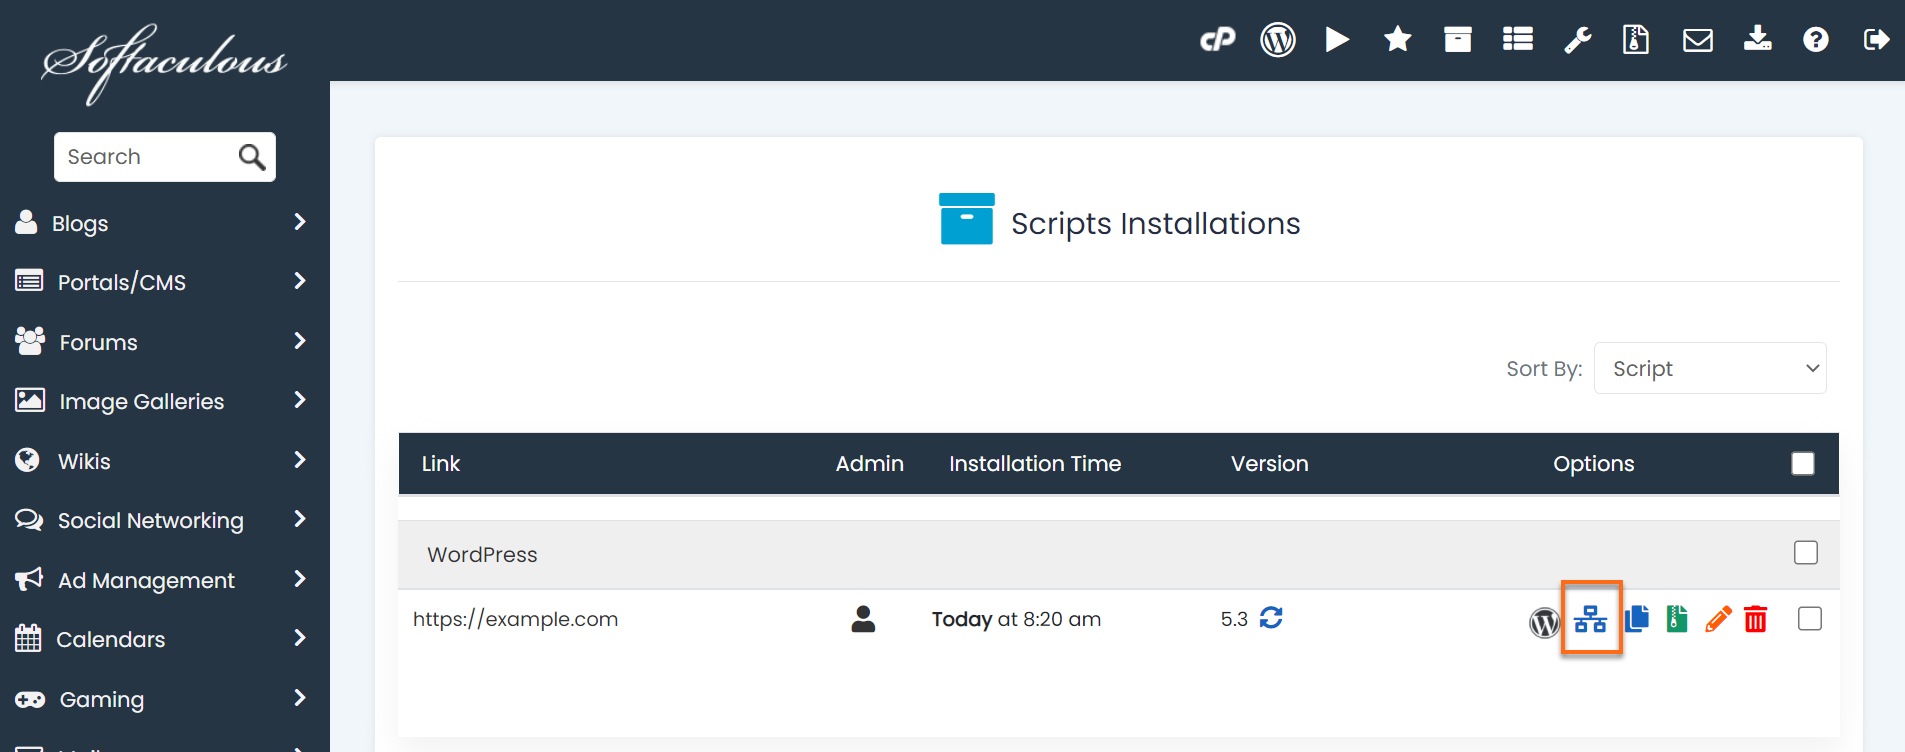
- At the top of the page, you see options for your installed scripts. Click on the Installations box.

- Locate the domain that you want to stage and click the Create Staging icon.

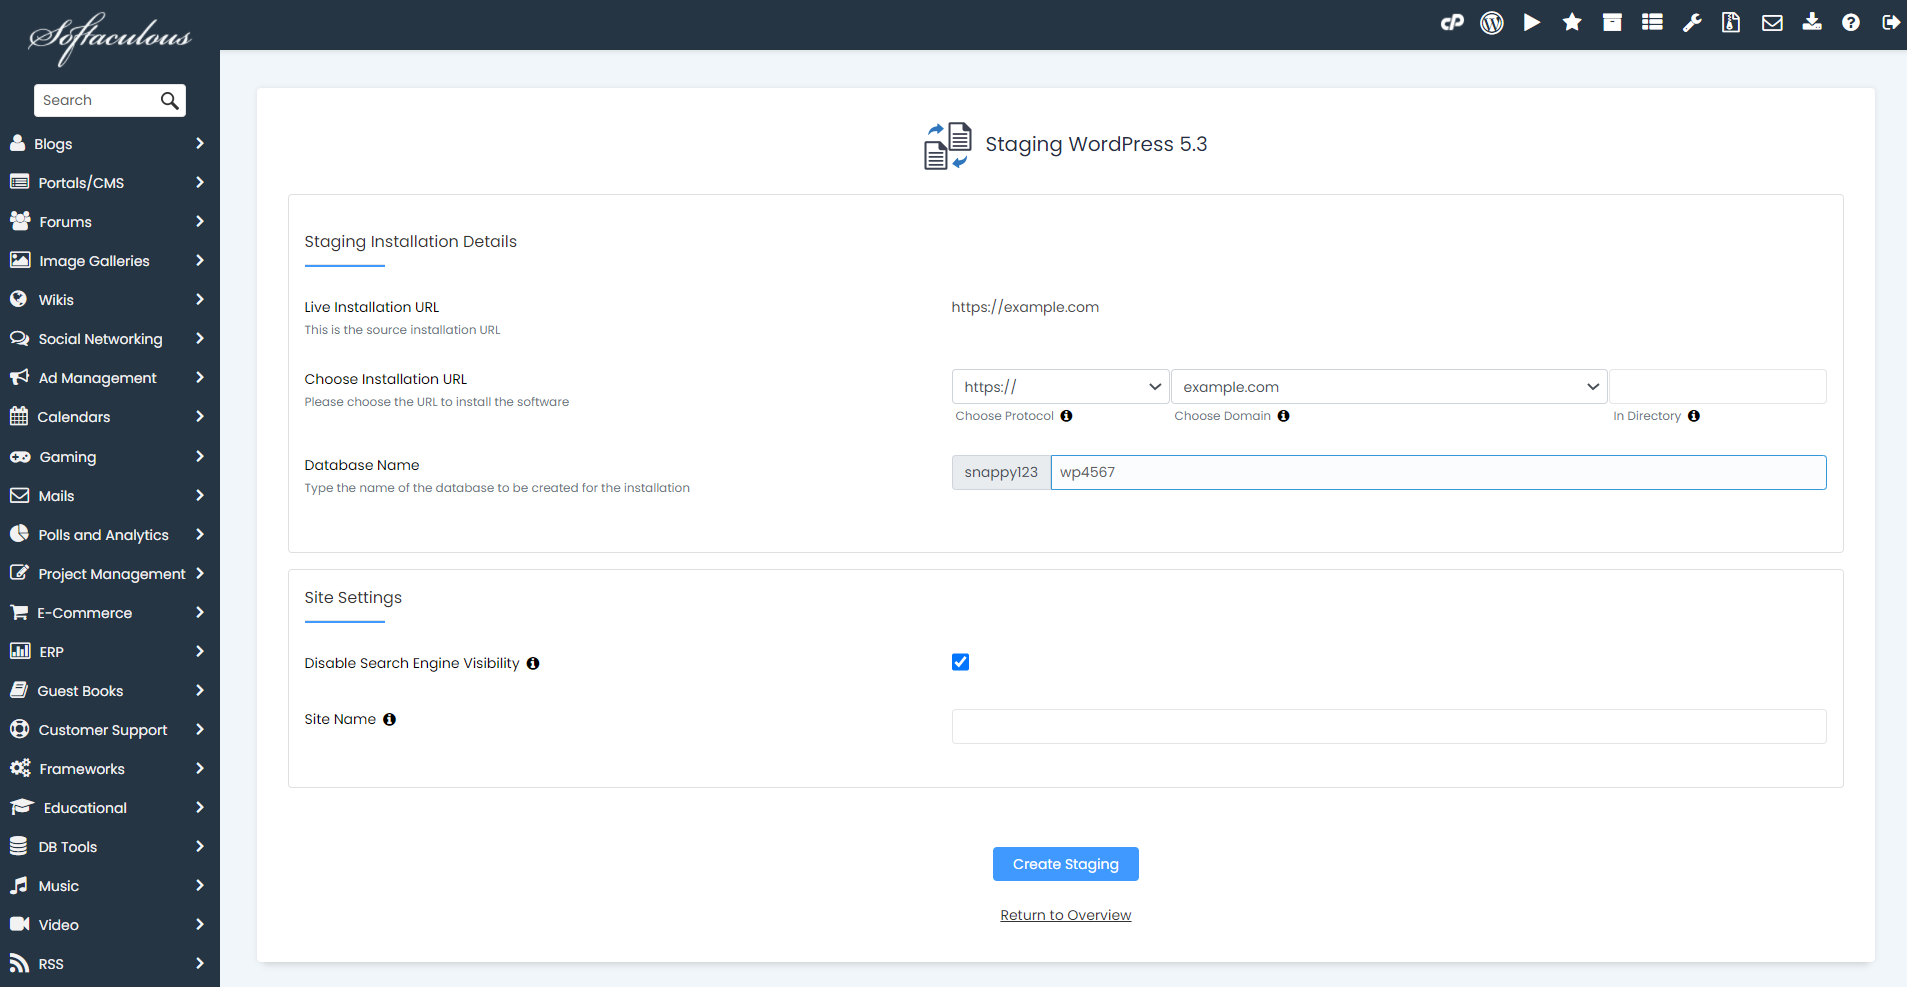
- Across from Choose Installation URL, select the domain you want to use for your staging site or enter a directory name in the last box labeled In Directory.

- Check the Disable Search Engine Visibility box if you do not want your staging site to show up in search engine results.
- If you want your staging site to be an exact duplicate of your live site, leave the Site Name box blank and click the Create Staging button.
- A progress bar will appear while it creates the staging site.

- You will then be presented with a Congratulations message and links to the staging site and its admin dashboard.
- Log in to cPanel.
Click on the link next to the Administrative URL to begin editing your staging site.
Note: The admin login details are the same as the admin login details of the source account.
You can now use this staging installation to test updates, develop a new version of the site, or any other changes you may want to test before pushing changes to the live site.
- Log in to cPanel.

